How to Resize Mac Dock: 2 Quick Methods Explained
There are two ways you can adjust the size of the Dock on macOS. While one way is to use the mouse/trackpad, the other method is to use the Dock Preferences. If you want to fine-tune the appearance of the app launcher instantly, go with the first method. However, if you prefer to adjust the size with a slider, heading into Dock Preferences would be the way to go. Thanks to a handy trick, you can dive into the settings of the app launcher with just a couple of clicks. Thus, fine-tuning the app launcher wouldn’t seem to be a tedious task.
Resize Mac Dock Using Mouse or Trackpad
The moment you place the mouse pointer on the right spot, it will turn into an arrow.
Now, if you want to increase the size of the Dock, hold the trackpad button/primary mouse and then drag it away from the Dock.
And if you want to decrease the size of your Mac Dock, drag the pointer towards the Dock edge.
Do note that there is a limitation to how large/small the Dock can be. So, it won’t increase/decrease when it reaches the maximum allowed size.
Resize Mac Dock Using System Preference
Adjusting the size of macOS Dock using System Preference is just as straightforward.
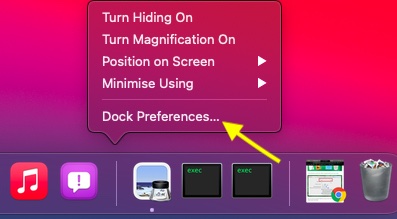
Now, a menu will appear with multiple options. Click on Dock Preferences.
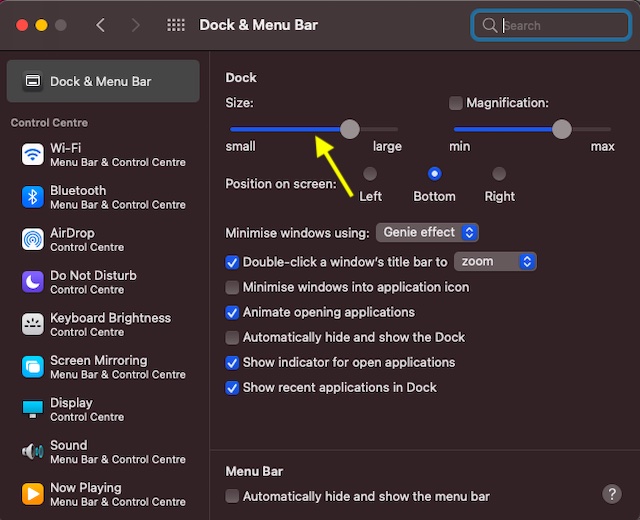
Next, you can use the Size slider to perfectly resize the Dock. Drag the slider towards the left to decrease the size of the app launcher. And drag it towards the right to increase its size. Once you have fine-tuned it, quit System Preferences.
Customize Dock on Mac With Ease
That’s pretty much it! So, that’s how you can resize the Dock on your Mac. Now, that you know how this little but nifty trick works, make the most of it to keep the appearance of the app launcher in line with your needs. By the way, what’s your take on Dock in general and macOS Big Sur in particular? Share your feedback and the sort of improvements you want to see in the app launcher.


