Disable Xbox Game Bar on Windows 10
There are two simple steps to disable Xbox Game Bar and Game DVR which can be configured just from the Settings page. However, if you want to completely remove Xbox Game Bar from Windows 10 then we have mentioned an advanced guide below. Depending on what you want, you can follow the tutorial accordingly.
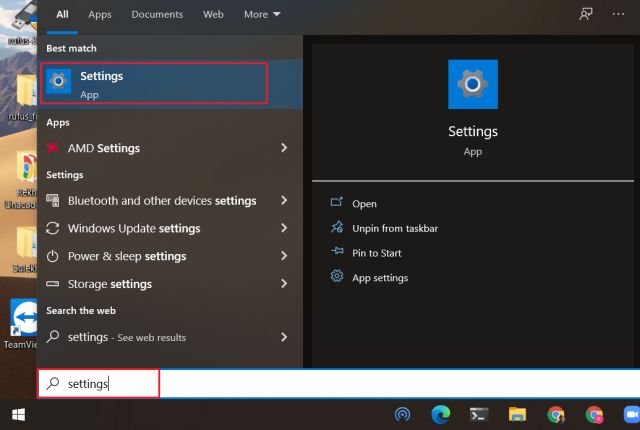
Press the Windows key once and type “settings”. Now, open “Settings” from the search result.
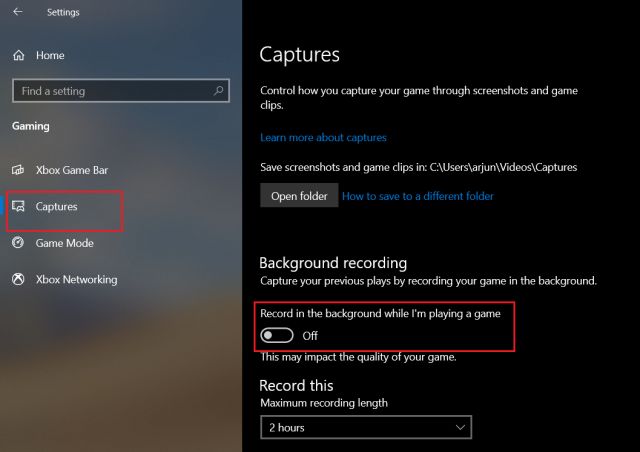
Next, open “Gaming” and move to the “Captures” tab. Here, disable the toggle for “Record in the background while I’m playing a game”. This will turn off video recording that runs perennially in the background and as a result, your PC will become much faster.
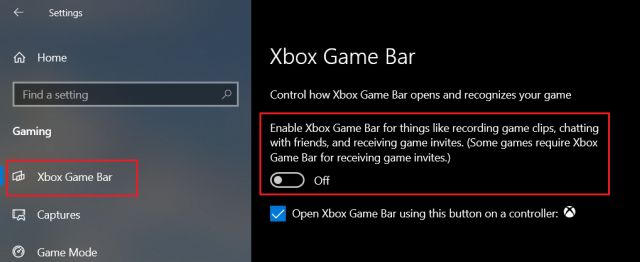
After that, switch to the “Xbox Game Bar” tab and turn off the toggle for “Enable Xbox Game Bar for things like record game…”. This will also free up lots of resources making your PC snappy in performance. In case, you want Xbox Game Bar then simply turn on the toggle.
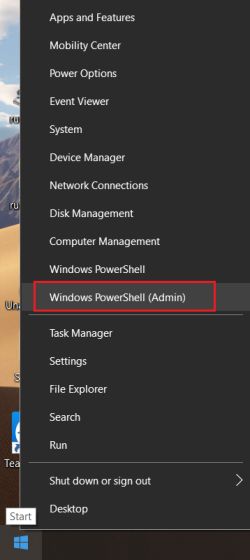
If you want to permanently remove Xbox Game from Windows 10 then right-click on the Start Menu and select “Windows PowerShell (Admin)”. Keep in mind, you must be on an Administrator account to perform this operation.
Here, copy and paste the below command and hit enter. Now, PowerShell will start removing Xbox Game Bar from the ground up.
In case, you want Xbox Game Bar back then you can simply install it from the Microsoft Store. That’s it.
Turn Off Xbox Game Bar and Game DVR on Windows 10
So that is how you can disable and completely remove Xbox Game Bar from Windows 10. This is a nifty trick to speed up your PC and you must use it if you don’t play games often. Apart from that, you can follow our exhaustive list of tips and tricks for Windows 10 which will significantly enhance your experience on a Windows PC. Anyway, that is all from us. If you found the article helpful then do comment down below and let us know.


